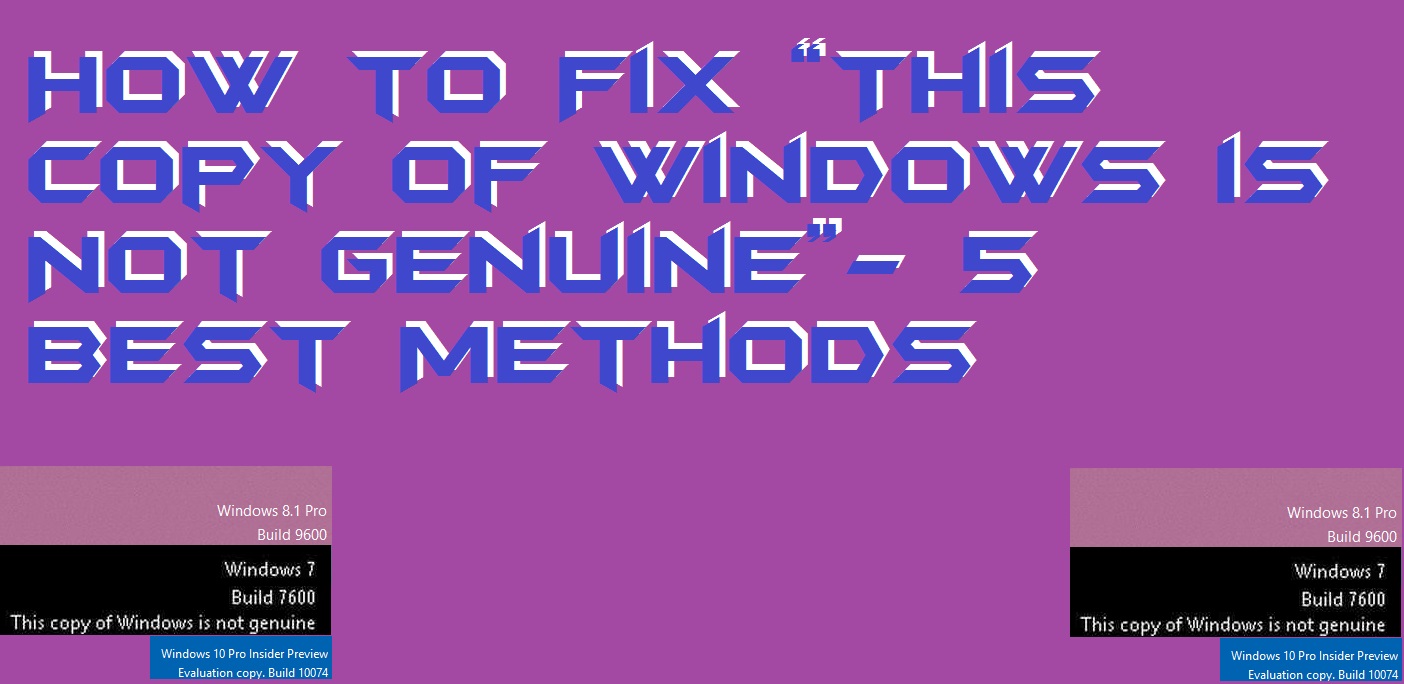
Hello friends, Today I will tell you a trick to Fix “This copy of Windows is not genuine”. You can fix this error in your Windows 7, 8, 8.1 and 10. These methods will fix Build 7600, 7601 and 9600 error. Users can fix all the error related to Windows is not a genuine issue.
Microsoft Windows is the most used OS among the people on regular basis for business or personal work all around the world. People tend to buy either the pirated version of Windows or the licensed one. If you have licensed version, it is well and good. But sometimes, pirated version seems more economical and provides almost the same features as the original. But Windows keep on creating a problem for the user by showing several errors and popups. These errors are shown on almost all Pirated version of Windows like.
You must have observer error while using the trial or pirated version of these Windows.
Read more: How to Activate Disabled Facebook Account – FB Account Disabled Solved [100% Working]
Well, I have the right tips for you to calm down and carry on with your daily routine. Our CTT team has done a huge research and found several methods to fix the copy of Windows is not a genuine issue. Here are 5 best and simple methods that cut down the pop up “This copy of Windows is not genuine”.
Read more: How to FIX Windows 10 Start Menu Missing Issue – 3 Best Methods
Read more: How to Fix Windows 10 WiFi Issues – Best Methods
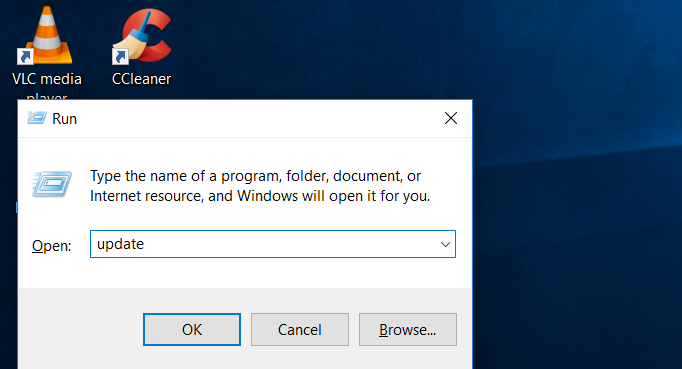
KB971033 update calls back to Microsoft servers every 90 days if you have a copy of Windows and displays the not genuine message.
Read more: How to Update Windows 10 Offline
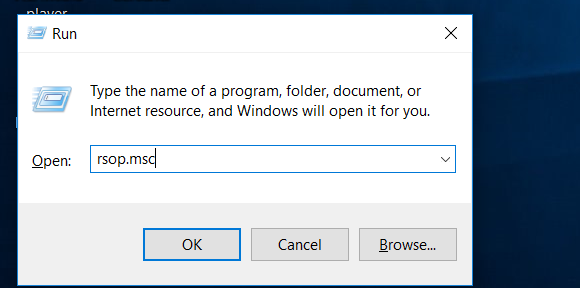
RSOP stands for Resultant Set of Policy. If your computer is experiencing Activation error message, run the Resultant Set of Policy wizard. This method works on pirated Windows 7 or Windows Server 2008 R2 where mostly the ‘not genuine’ message pops up.
By this method, you won’t get any updates on your pirated version of Windows OS and thus the notification.
Note: These methods are for Education purposes only. Misuse may lead to legal problems.
These are the best methods to fix this problem. Some methods may not work for some versions of Windows but that is the reason many alternative methods are provided. So was this tech trick of use? If you know any other methods please comment in the comment section below and also don’t forget to share this article with your techno-geek friends.
This post was last modified on February 26, 2022 18:14
Are you creating a website and trying to find an easy-to-use solution to give it…
I have shared the 10 best Plex alternatives. You can use this Plex alternative to…
What are super-cardioid microphones? Have you ever got confused between a microphone and a super-cardioid…
I have shared the complete details on what is Gaming Chair. Also, check all the…
I have shared the 2 best Video Doorbells without subscription. You don't need to pay…
You can easily Set up a Plex Server on your Windows PC/Laptop by following this…
This website uses cookies.