Hello friends, Today I will tell you best-tested method to fix the problem of Resetting your PC. Users can Reset PC Windows 10 by using several easy tricks. You don’t need to install any software or any Windows. Users can reset PC Windows 10 using easy CMD, Windows 10 SFC, DISM scans and much more easy methods.
How to Reset PC Windows 10
Sometimes, it may happen that your PC would not reset. These problems occur if your version of Windows is bugged. This problem of reset occurs if your PC already had Windows 10 installed and was not upgraded from the previous versions. You might have created a USB recovery drive using the feature present in the Windows 10 or booted PC to the USB recovery drive by selecting Troubleshoot to reset PC. There are much more reasons due to which you might be facing this problem.
How to Reset PC Windows 10
Make sure that you go through the user manual for specific instructions. Follow the following steps to do so:
- While restarting your PC, press Esc, F8, F10 or F12 when the PC company logo surfaces. Or check if any button is mentioned at the corner when the logo appears and hit the button.
- Select which ever appears from this – BIOS setup, BIOS setup utility or Boot option.
- If you’ve selected Boot option, choose USB/CD/DVD whichever you might be using.
- If you’ve chosen BIOS Setup then select Boot section.
- In the Boot order, the USB recovery drive must be on the top of the order.
- Save and Restart your PC or simply long press Shift while clicking on Restart.
Method 1: Running Windows 10 SFC and DISM scans
These scans help in fixing the corrupted registry files or Windows files.
SFC Scan:
- Connect USB recovery drive to your PC à then Restart.
- After a while, the screen displays “Press any key to boot from device…” à Press any key. (If it doesn’t say go to the end of the page.)
- Select Repair your Computer from the Windows Installation page.
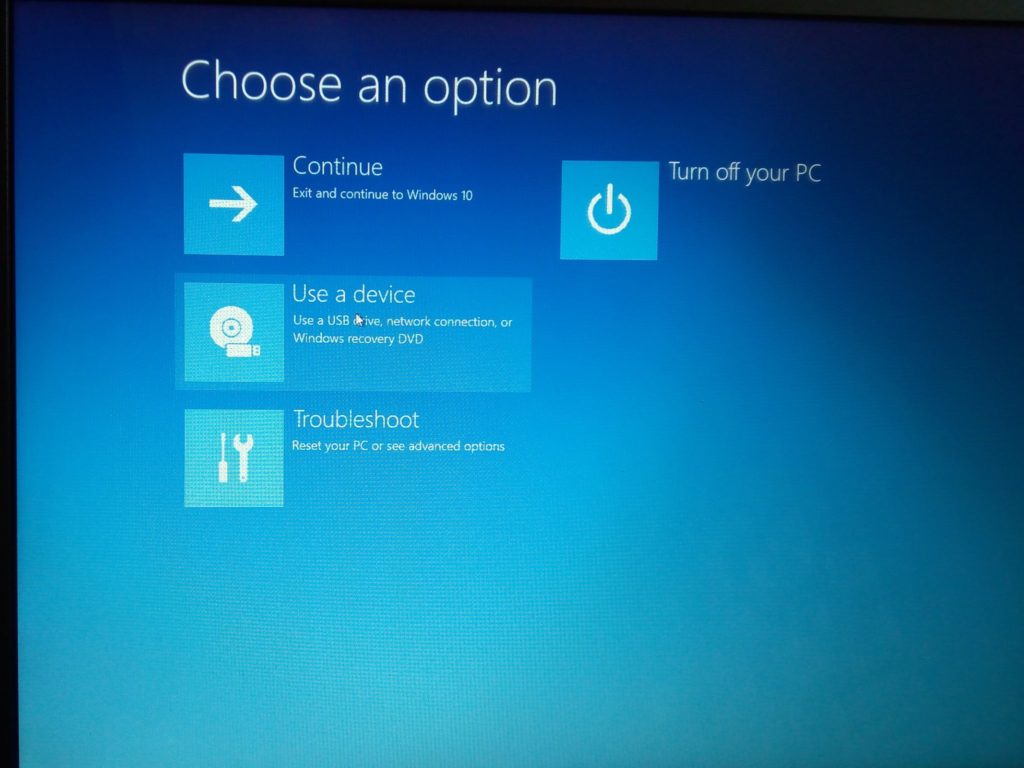
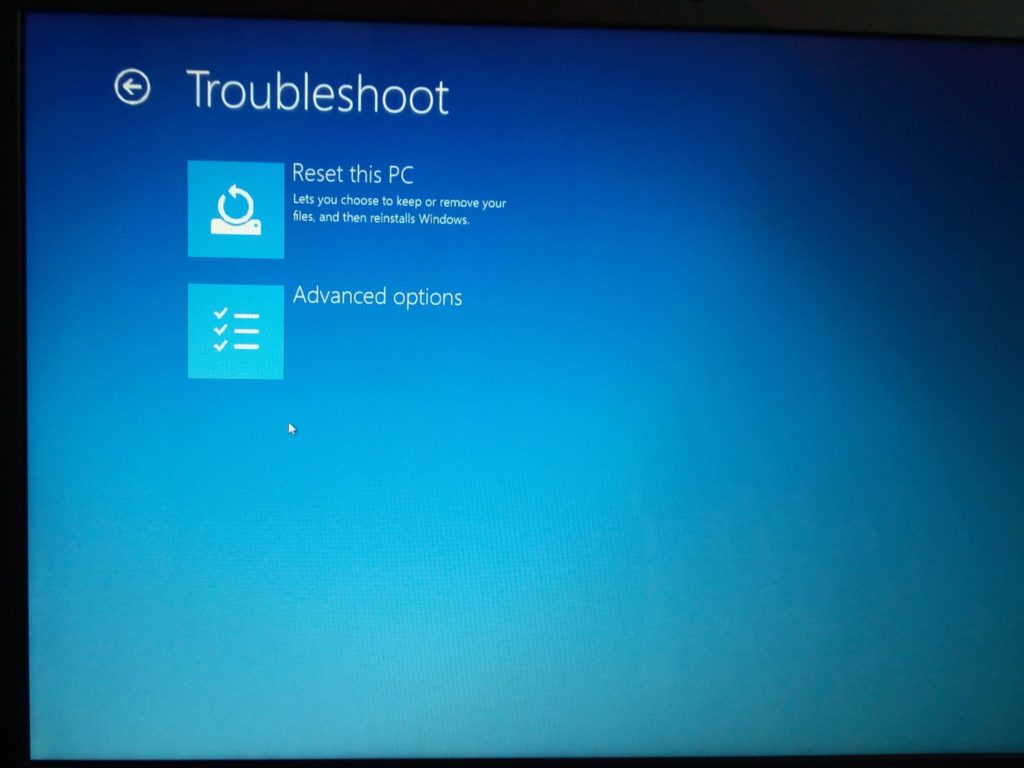
- Press Troubleshoot -> Advanced Options -> Command Prompt.
- Type sfc/scannow/offbootdir=d:\/offwindir=d:\windows then press Enter. Here “d” means the (C 🙂 drive where Windows is installed.
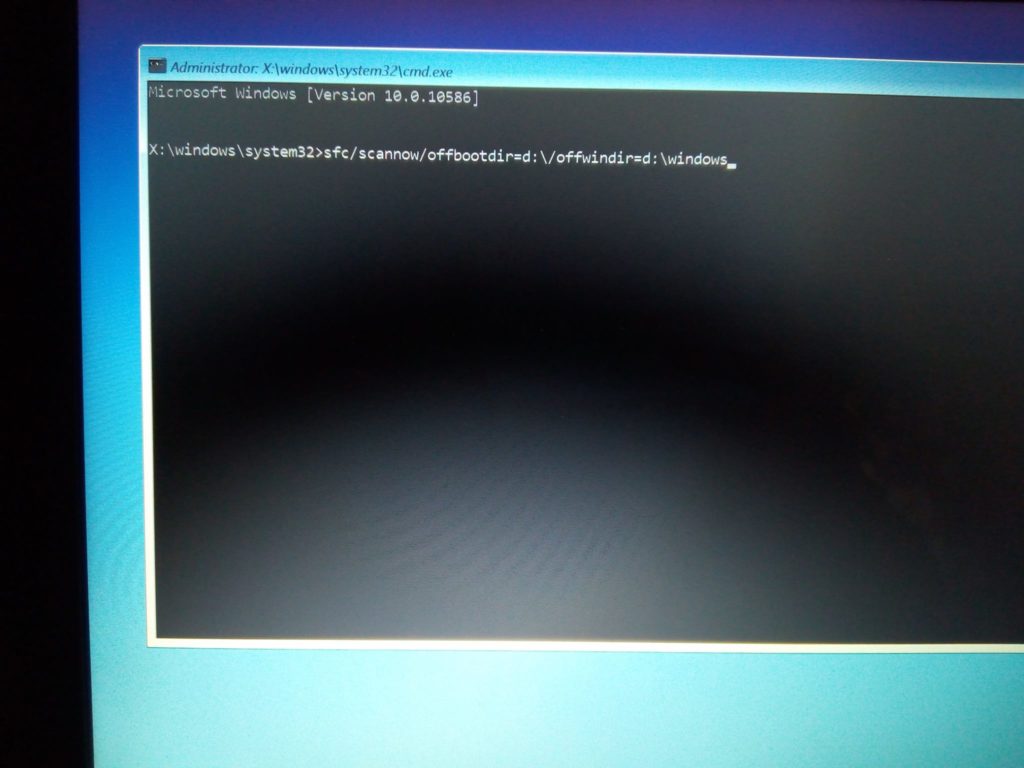
- After it finishes scanning, you will get a message either saying that system problems are fixed or system found no errors.
- Repeat the scan 3 times.
DISM tool: After completing SFC scan, DISM scan should be taken since it uses installation disc to repair Windows. - Type mkdir c:\mount in Command Prompt then press Enter.
- Type DISM.exe /mount-Image/ImageFile:d:\sources\install.wim /index:1/mountdir:C:\mount\/readonly then press Enter.
- A message pops saying mounting image and it should be completed saying “Operation completed successfully”.
- Type dism.exe/Online/Cleanup-image/Restorehealth/Source:c:\mount\windows/LimitAccess then press Enter.
After using DISM tool, re-run the SFC scan again 3 times. This helps in fixing any corrupted files on your PC.
Read more:Top 3 methods to Download Windows 10 Creators Update and Upgrade Assistant
Method 2: Command Prompt Windows 10
Check if you have System Restore points. You can check by the following procedure.
- Connect USB Recovery Drive to your PC and then Restart.
- Press any key when the screen displays “Press any key to boot from device”
- Click on Repair your computer present on the Windows Installation page.
- Click Troubleshoot -> Advanced Options -> System Restore.
- Select the recently used System Restore point as per instructions displayed.
Method 3: Recovery Drive Windows 10
This method is quite useful but you need to take care because it erases all your personal data on the PC.
- Connect USB Recovery Drive to your PC and then Restart.
- Press any key when the screen displays “Press any key to boot from device”
- Click on Repair your computer present on the Windows Installation page.
- Troubleshoot ->Advanced Options ->Recover from Drive or System Image Recovery
- Follow as per the instructions displayed later.
Method 4: Repair Drive Windows 10
- Connect USB Recovery Drive to your PC and then Restart.
- Press any key when the screen displays “Press any key to boot from device”
- Click on Repair your computer present on the Windows Installation page.
- Click Troubleshoot -> Advanced Options -> Startup Repair
- Follow as per the instructions displayed later.
Read more: How to Disable Fast User Switching On Windows 7, 8, 8.1 and 10 – 100% Working
Method 5: Command Prompt
- Boot into System Recovery and open Command Prompt.
- Choose the administrator account.
- Type in the password of your user account.
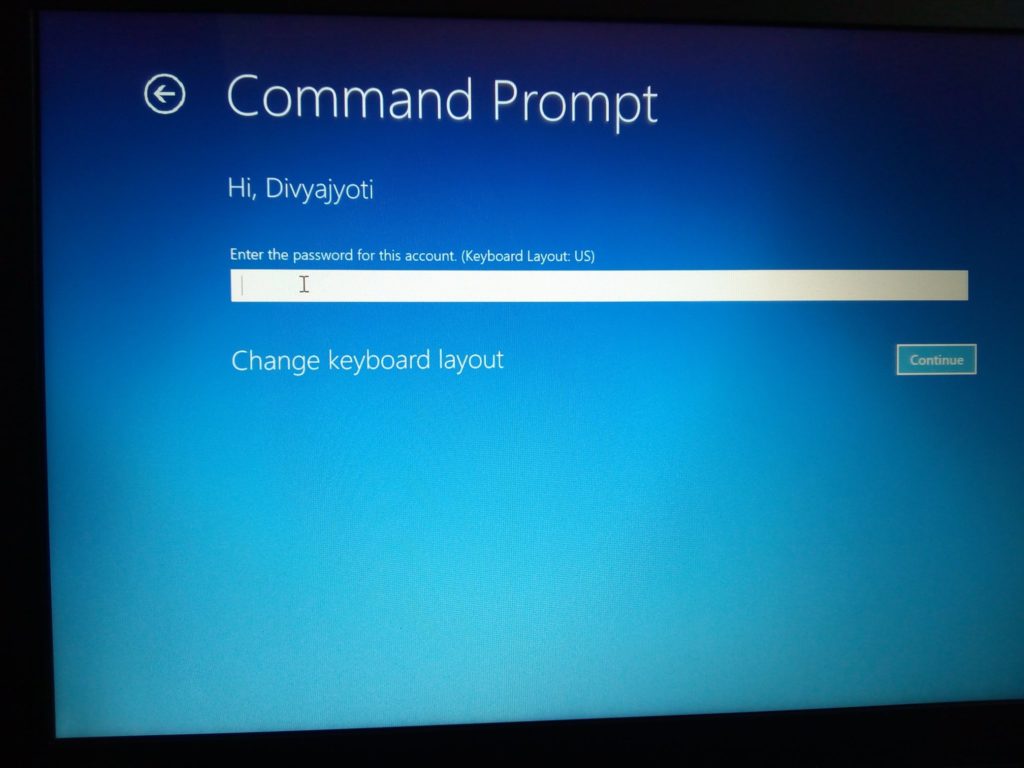
- Type cd %windir%\system32\config (press Enter) ren system.001 (press Enter) ren software.001
- Close Command Prompt. You will be redirected to the System Recovery screen. Select Continue.
- After reboot, your system will be successfully fixed.
Read more: How to Download UC Browser for PC/Laptops on Windows XP, 7, 8, 8.1 and 10 – 100% Working
Note: The first 4 methods make use of a USB Recovery Drive and are totally reliable. The STEP 2 of these methods may not work because of the boot order which you need to change from the bios. This method may work on certain PCs only.
Conclusion
These methods are verified and are true. Go through the note mentioned above before you step on to try the methods directly. If you don’t seem sure, leaf through the user manual for accurate instructions regarding your PC. Hope you found these methods useful. Please write in the comment box if you know of many more methods and do share this article with your friends who are upset with these problems.
Leave a Reply