Hello, friends! Today, I am going to tell you about 5 different methods to take screenshots on Windows 10. User can use these method to take any size screenshot. All the methods are working and tested. You don’t need to download or install any software. Just follow the simple commands to take a screenshot on Windows 10.
How to Click Screenshots on Windows 10 PC/Laptops – Top 5 ways
Some of you might not be habituated using many new commands that the Windows 10 offers. Sometimes just “PrtSc” does not seem to work. You as well have other options. While gaming, usually with different windows open, “PrtSc” may not help. That is why the right computer user must know the other ways so that the computers become more user-friendly. I will share top 5 methods to screenshots on Windows 10.
Read more: Best Methods to take Screenshot on Samsung Galaxy Note 3
Method 1: Alt+Print Screen
Windows 10 captures just the active window instead of taking a screenshot of the whole screen. This is of mighty help when a lot of windows are open and comes handy for larger screens.
How to take Screenshots on Windows 10 using Keyboard
Press the Keys Alt + PrtSc on your Keyboard to save the image to the clipboard. It will be best if you paste it in Paint to acquire it.
Method 2: Win+Print Screen
The screenshot captured by this combination saves your screenshots to the drive instead of copying it to the clipboard. The images of your screenshots get saved in the Pictures, into the Screenshots folder as PNG files. This tool is useful for capturing the whole screen and saves time. Moreover, it creates a PNG file directly instead of pasting it into the paint and processing.
Read more: How to Take a Scrolling Screenshot on Windows 10
Method 3: Win+H
This tool is handy if we want to share a screenshot directly without wasting any time saving to the folder or pasting in the paint for further processing. The screenshot can be share through a panel that appears on the right. It allows sharing to various social sites, mail, messaging, etc.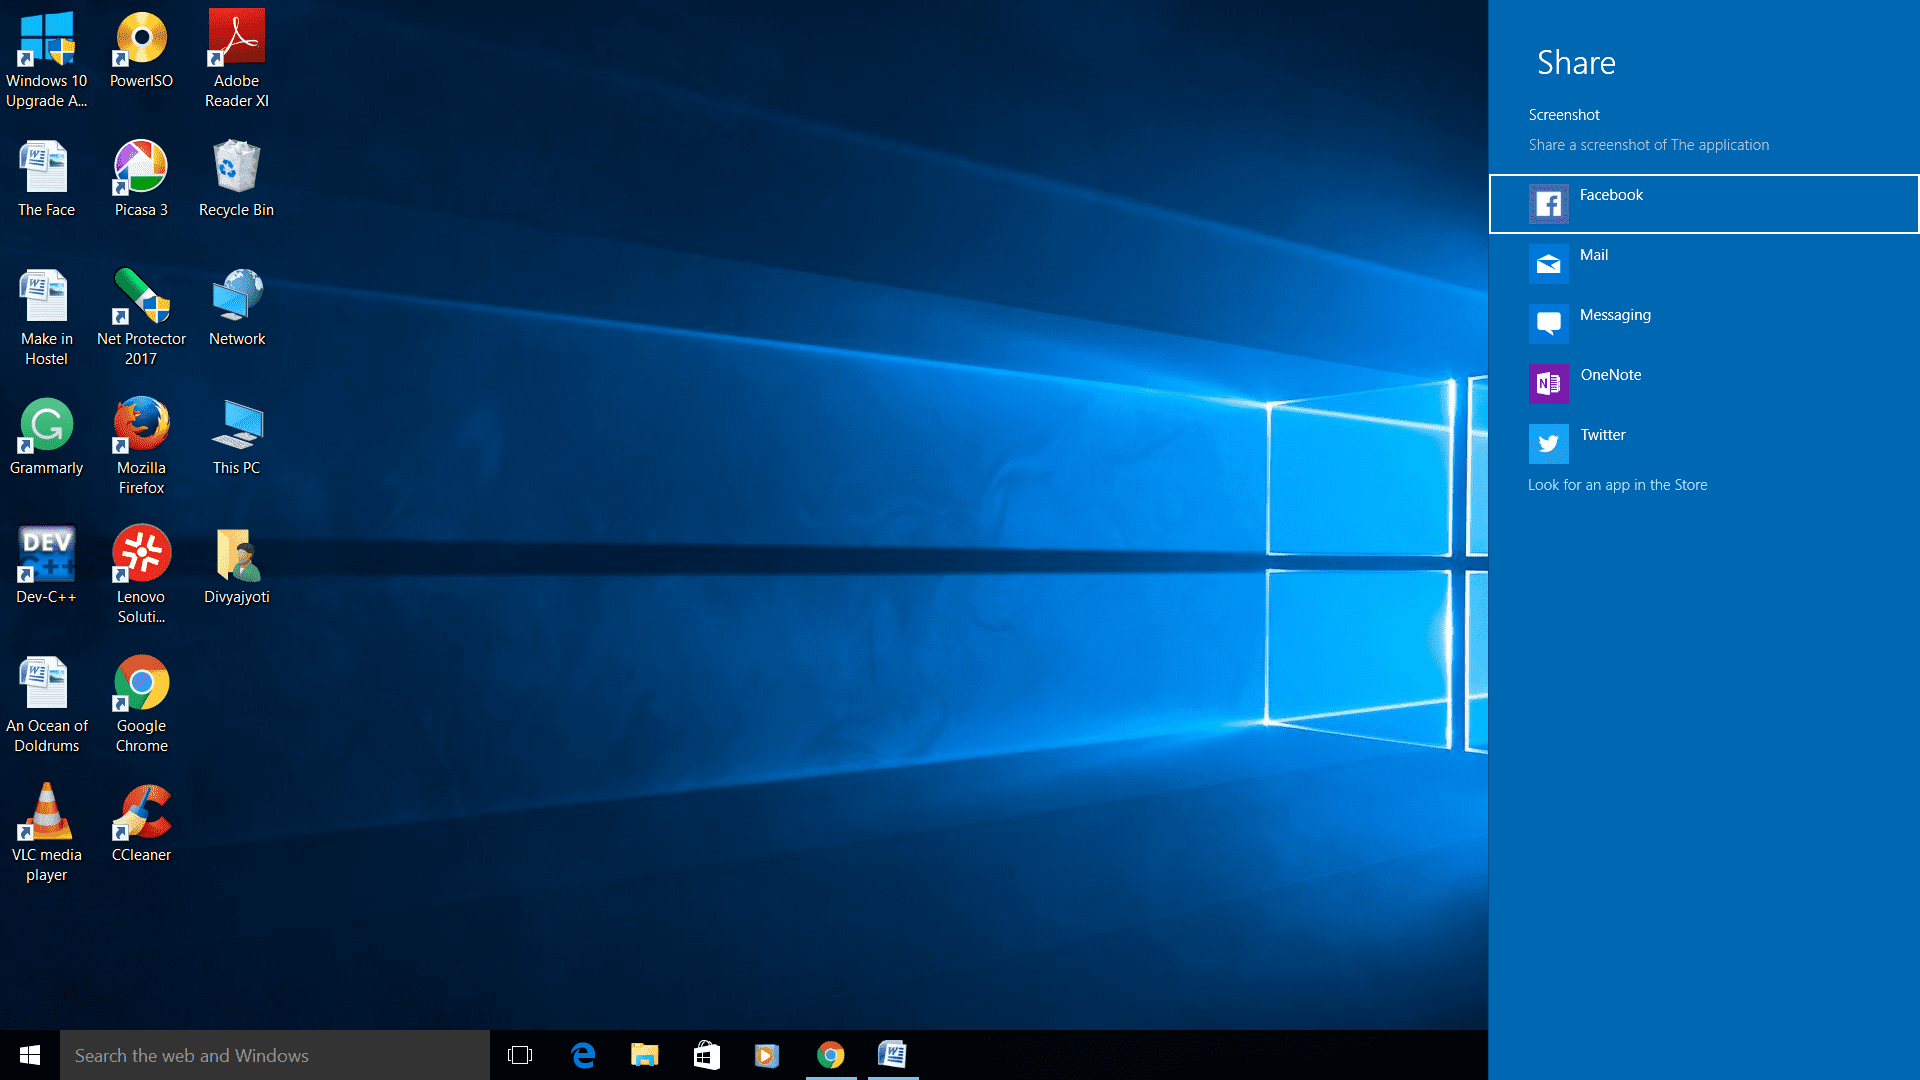
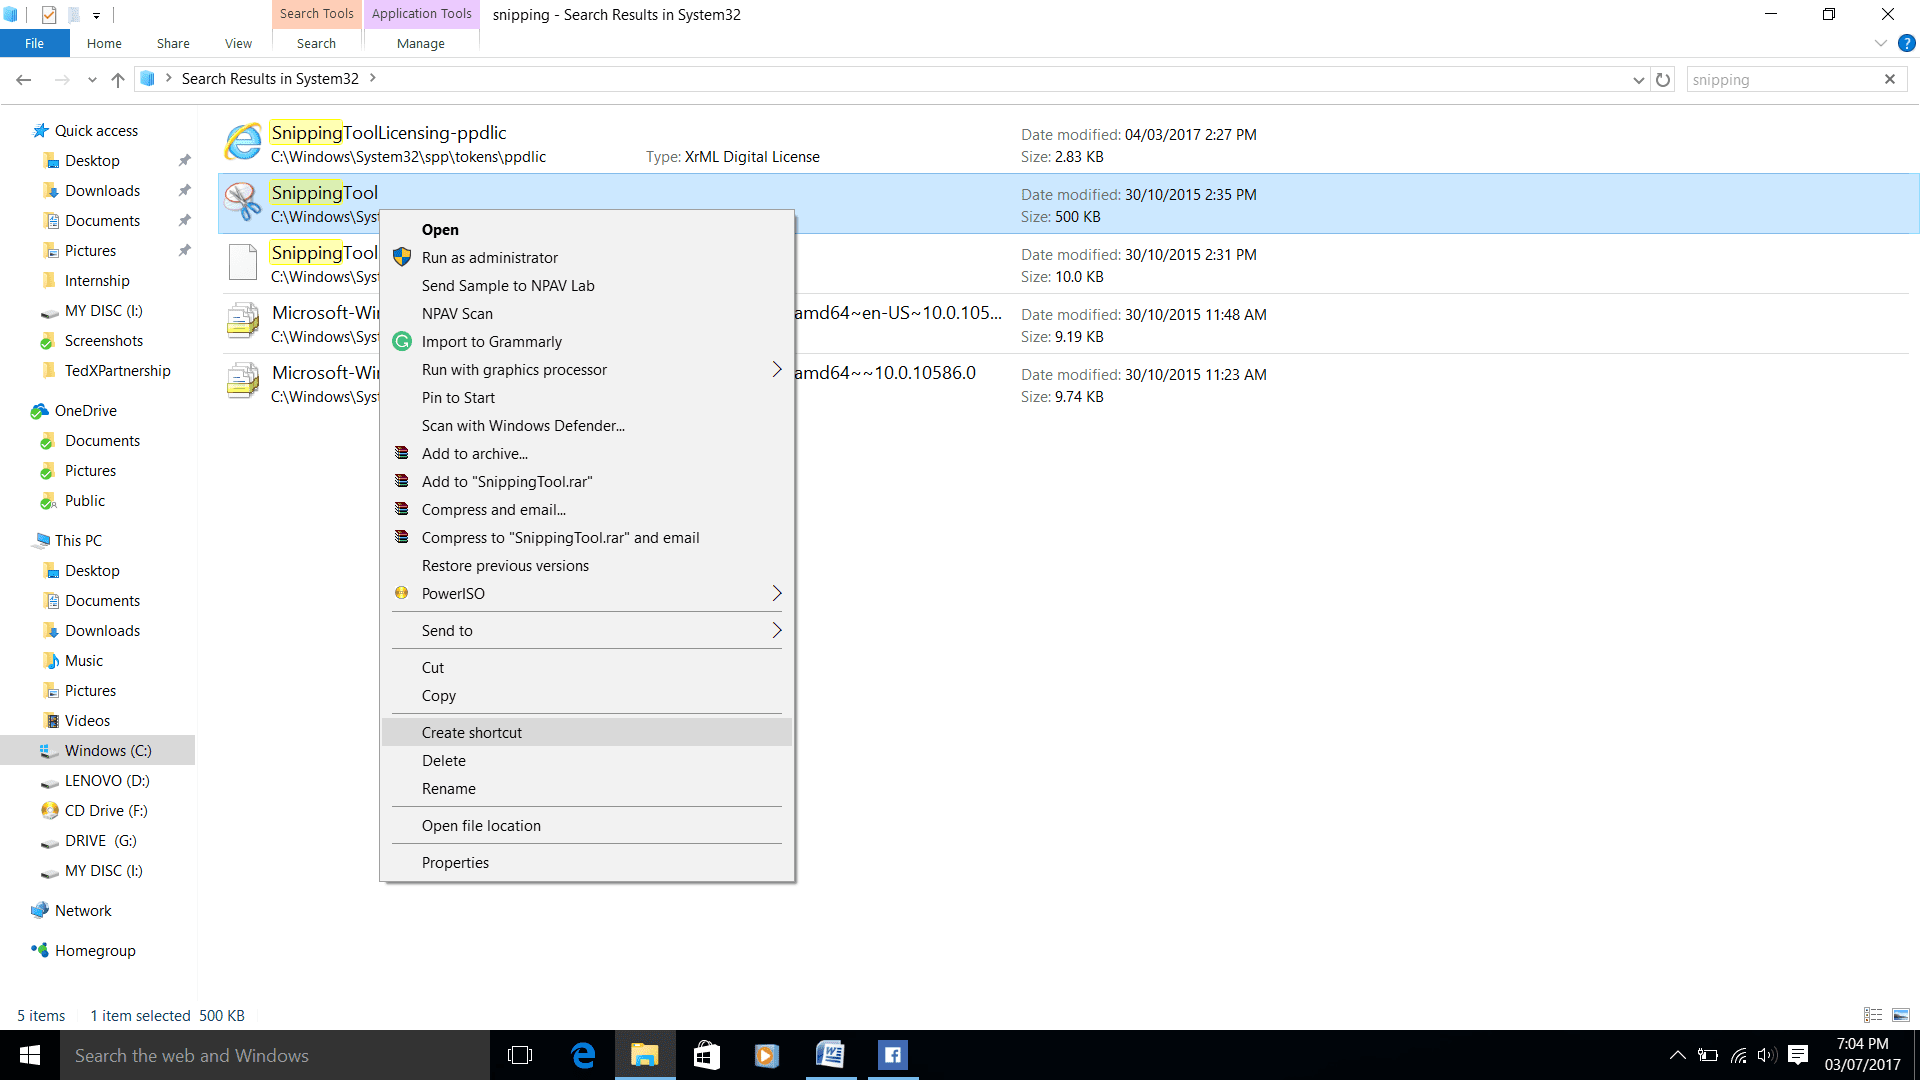
Method 4: Snipping Tool
This tool hands over the user’s control to capture the screenshot in a way the user desires. The screenshot shape can be customized according to the user. The shapes can be free form, rectangle, square, anything. It has a timer so that you can capture it at the right moment. You can edit, highlight, and doodle on the screenshot.
How to take Screenshots on Windows 10 PC using the Snipping Tool
- Open file explorer and search for snipping tool application in the System32 folder in your (C 🙂 drive.
- Right-click on the .exe file > select Create Shortcut. The shortcut gets saved on the desktop.
- Now, Right-click on the shortcut and select Properties.
- Set a Shortcut Key in the field provided.
Read more: How to Take a Screenshot on a Mac
Method 5: Game DVR
If you want to take screenshots while playing games, you can do it by activating Game DVR. By pressing Win+Alt+PrtSc, you’ll get a notification that your screenshot was successfully saved in the Captures folder of the Videos library.
How to turn on Game DVR on Windows 10 and take Screenshot
- Open the Xbox app.
- Go to Settings of the Game DVR tab.
- Check the “Record game clips and screenshots using Game DVR.”

Read more: How to login to Windows 10 Without Password
Conclusion
This article can prove to be knowledgeable. Though you know some ways of capturing screenshots, many of them may not be feasible at particular times. So don’t just hit the PrtSc button of your keyboard, try new things and have fun trying them. If you know any other easy method to
Leave a Reply