You can remove duplicate contacts from your Android by following these two methods. I have shared both inbuilt methods to eliminate duplicate contact numbers on your phone.
Occasionally, your Android phone will create two or more duplicates of single contact, depending on the circumstances. However, to keep our Android smartphones in good condition, we like to make sure everything is tidied up including deleting duplicate contacts. You must also often encounter this when you factory reset a smartphone and sync the contacts, or when you swap SIM cards and accidentally sync all contacts with the new device.
As a result, it may be difficult to sort through your contact details. Although deleting a contact in its entirety by hand is possible, it will take a long time. Luckily, we have a few easy methods that will allow you to remove duplicate contacts from your Android phone within seconds with a few clicks.
Read more: How to Backup Contacts to Google Drive on Android
How to Remove Duplicate Contacts from your Android phone
Syncing other apps’ contacts with your Android phone can cause duplicate Contacts from the Contacts list. For example, you may have duplicate Contacts from Gmail or Hotmail. It is possible that duplicate Contacts in your Contacts List will appear on accounts like Gmail, Hotmail, Instagram and Facebook.
- From your Android phone contact app.
- Using Google contact app.
Now, let’s get into the precise details of the stages to remove duplicate contacts from your Android phone.
Read more: How to Save Contacts on Google Account
1. From your Android Phone Contact App
To save the hassle of manually merging duplicates, Android smartphones often provide a built-in option that does it for you. Because you can use your Contacts app on your smartphone, there is no need to install any additional apps. It can combine all contacts with the same name, phone number, or email address.
So, As previously indicated, some smartphones allow users to remove duplicate contacts from your Android the default Contacts app. Rather than wasting so much time now, let us go to step:
- Select the Contacts app on your Android device.
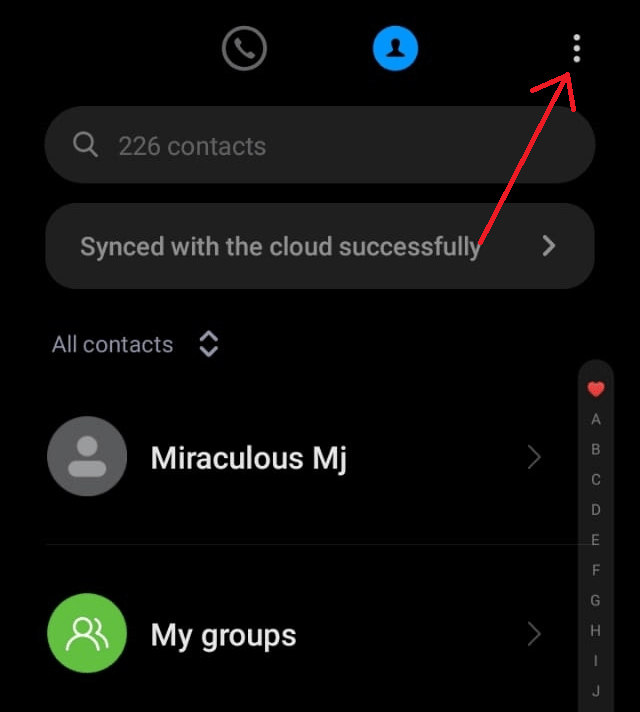
- When you’re in the upper right corner of your screen, click settings (or the three-dot icon).
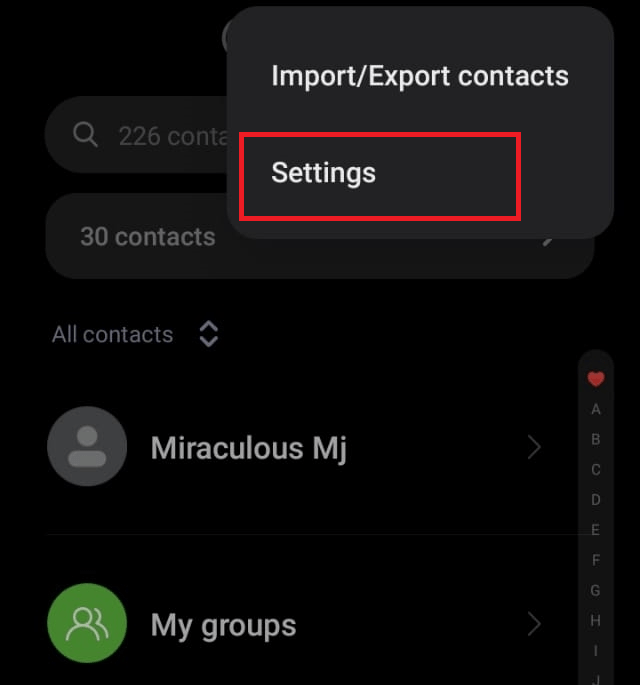
- Within the drop-down menu, there is an option to merge duplicate contacts.
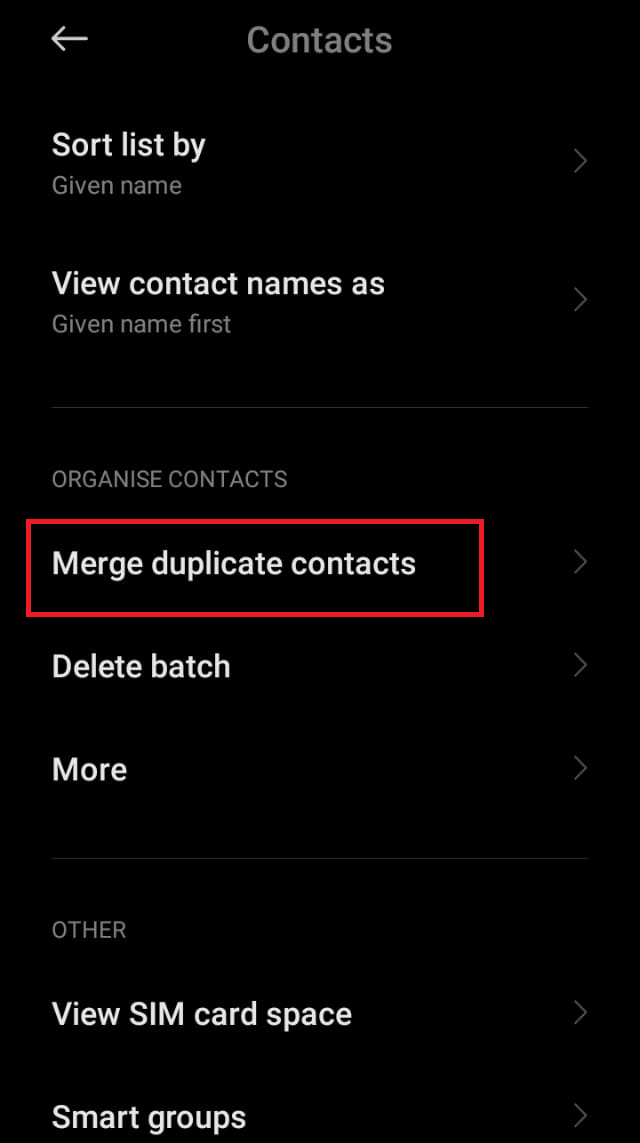
- Alternatively, you can go through the list and eliminate any Contacts that you don’t want to merge with the ones you want.
- When you’re finished, click on Merge to save your work.

Read more: How to Add Contacts on WhatsApp
2. Using the Google Contact App
Officially, Google Contacts is the company’s contact management tool. Having this app on your phone will allow you to carry your personalized phone book wherever you go. Let us now move on to the procedures for removing duplicate contacts from your Android phone.
- Sign in with your Google account once you have downloaded and installed this program on your Android device.
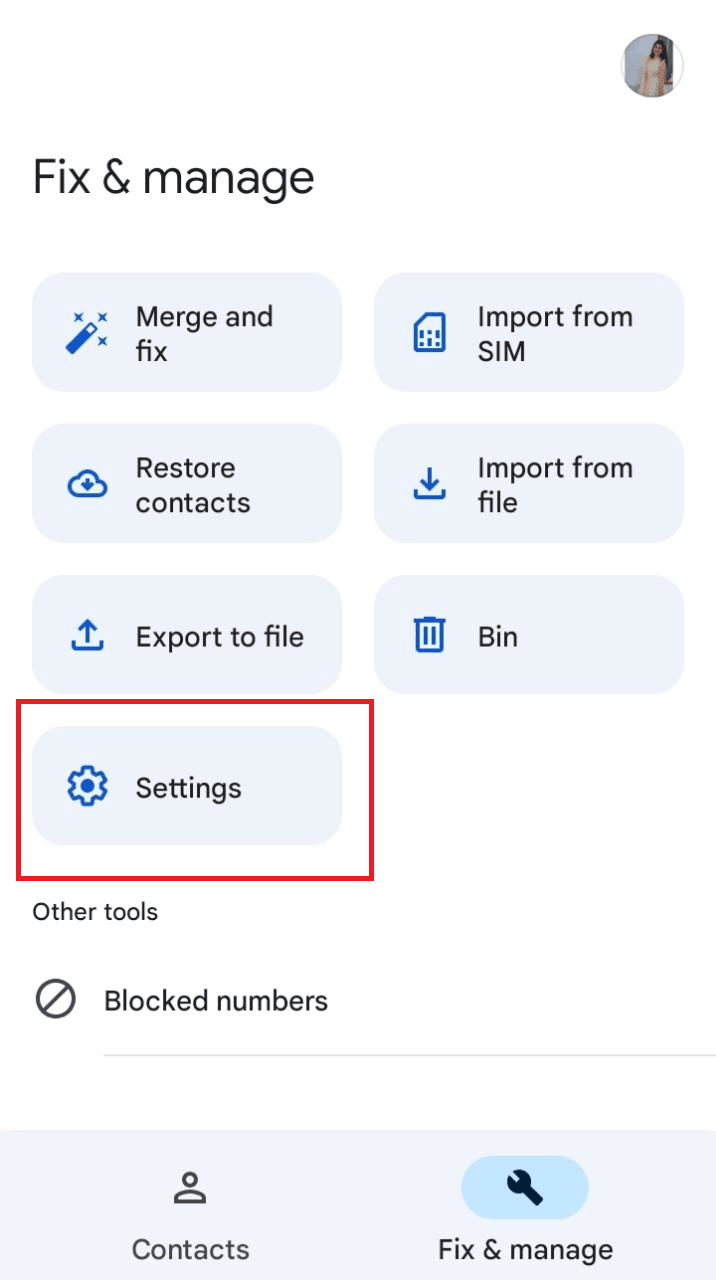
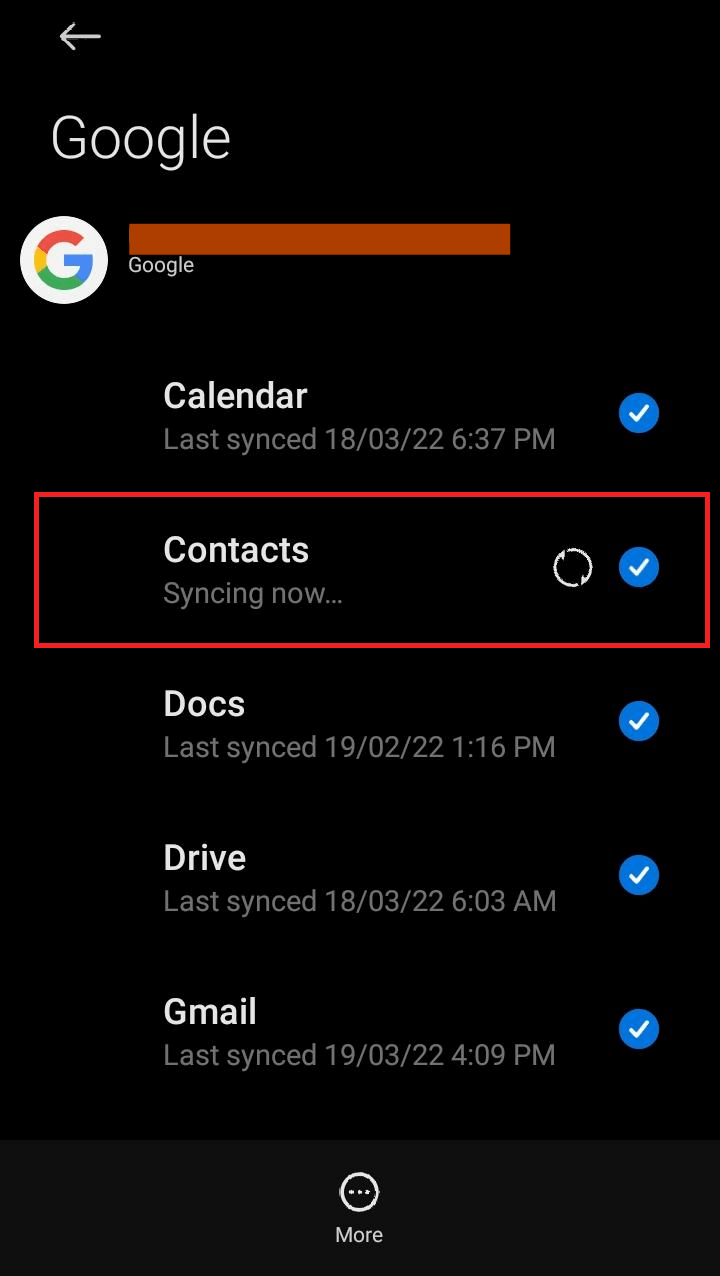
- In Fix & manage > setting > accounts > google, you’ll find the contact for synchronized.
- In order to activate “Contacts”, you must first hit your account. Google Contacts will be synchronized.
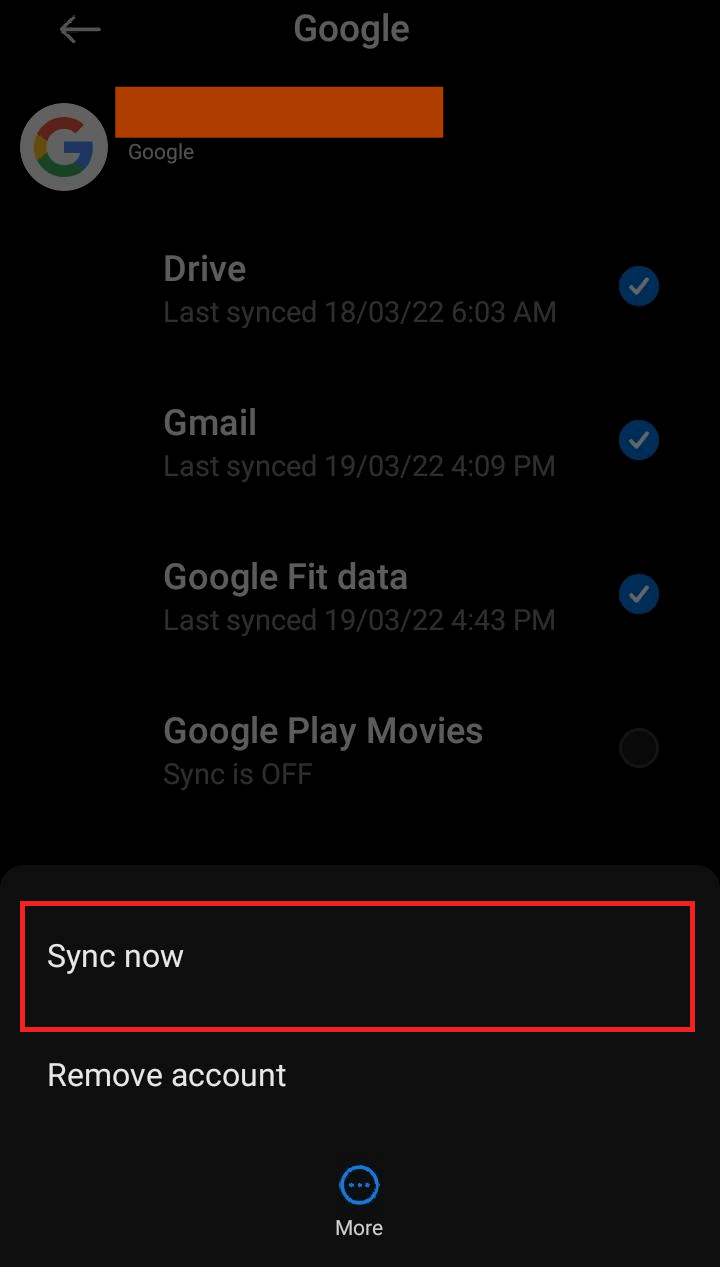
- Tap the “more” > “sync now” button in order to delete all of the contacts that aren’t unique. It will eliminate any and all overlapping contact information.
Read more: How to Backup Android Contacts to Laptop
Conclusion
Having duplicate contacts can be inconvenient because they clog up your contacts list and eat up valuable storage space. However, having a well-organized contact list is a surefire way to lift your spirits. Moreover, There are a variety of apps available for you to try, but we’ve only identified two that you should consider. Finally, we hope you found this site to be really helpful. if you find our blog informative, please let us know by leaving a comment in the space below.
Leave a Reply