Learn how to increase virtual memory in Windows 11, which in turn will improve system performance, reduce lag, prevent low memory issues, and also provide better support for multitasking with simple step-by-step guides.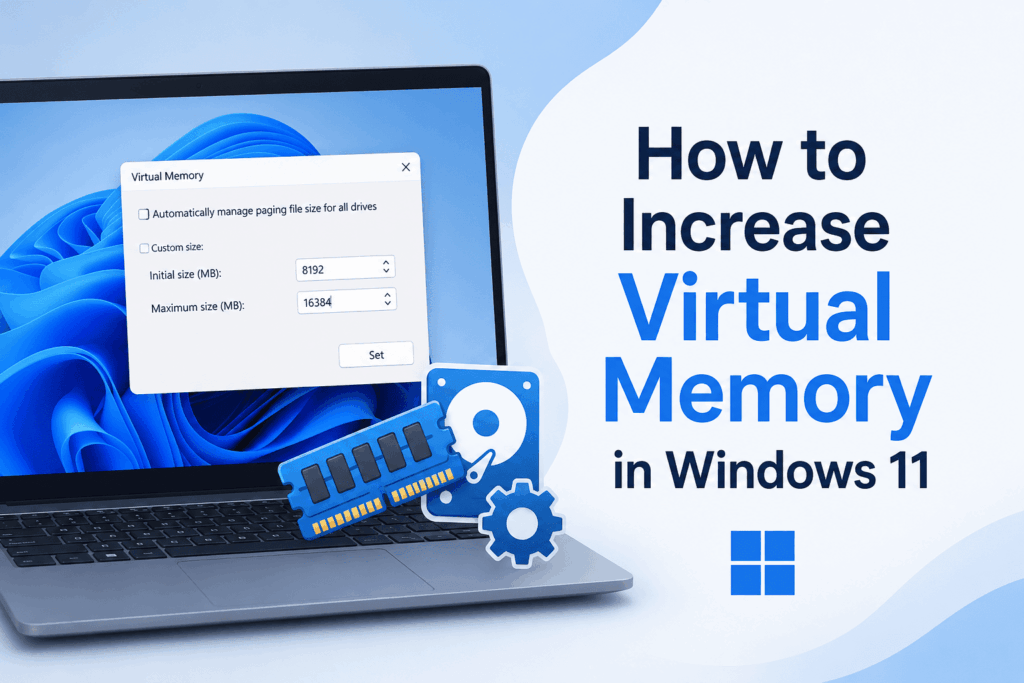
How to Increase Virtual Memory in Windows 11
If you notice your computer slowing down when you are running many programs at once, increasing virtual memory can improve performance. In Windows 11, many users go to the trouble of Increasing Virtual Memory when they see lag, freezing, or low memory warnings. Virtual memory functions as an extension of your physical RAM, using part of your hard drive or SSD as temporary storage. That said, setting up Virtual Memory in Windows 11 is a simple and effective way to improve system performance.
Read More: How to Fix Not Enough Memory to Open This Page Error
What is Virtual Memory?
Virtual memory in Windows 11 is a feature that reports to the user that it is using storage space as extra memory when your RAM is at full capacity. As you increase virtual memory in Windows 11, the OS puts in place a paging file, which is a temporary data store. This, in turn, allows your computer to perform well even with memory-intensive programs open.
While virtual memory may be slower in speed than physical RAM, it is still a useful supplement. Also, in Windows 11, many users opt to increase the virtual memory for better performance of multitasking and to also see a reduction in application crashes.
Read More: What is System Error Memory Dump Files
Why Increase Virtual Memory in Windows 11?
There are ways to increase virtual memory in Windows 11.
- Improve system performance under high load.
- Reduce delay when running multiple applications.
- Prevent low memory warnings.
- Improve your gaming and content creation experiences.
- Support for software that is heavy in terms of memory use, like video editing and graphic design programs.
If you find that your PC is running slowly often, it may be a solution to increase virtual memory as a fix.
Read More: How to Fix Windows 10 Memory Leak
Steps to Increase Virtual Memory in Windows 11
Here are easy ways to Increase Virtual Memory in Windows 11:
- Press Windows + S and search for Advanced System Settings.
- Open View Advanced System Settings.
- In the Performance Section, click Settings.
- Select the Advanced tab.
- In the Virtual Memory tab, go to Change.
- Do not check Automatically manage paging file size for all drives.
- Select your custom size.
- Set an Initial Size and a Maximum Size according to your available RAM.
- Click the Set button then OK.
- Reboot your computer to see the changes.
After we restart the system, Windows will apply the new paging settings, which will see us increase virtual memory in the case of Windows 11, at which point you may note improved overall system performance.
Recommended Virtual Memory Settings
A typical suggestion is to set the initial size to 1.5 times your installed RAM and the max size to 3 times your RAM. For instance, if you have 8 GB of RAM, go ahead and set it up that way when you are increasing Virtual Memory in Windows 11.
Virtual memory is a solution that should be noted does not replace physical RAM. If you are still having performance issues, you may see more benefit from a RAM upgrade.
Conclusion
Knowing that you can increase virtual memory in Windows 11 will improve your computer’s performance and stability. As you game, edit video, or run many applications at the same time, increasing virtual memory will see to it that your system doesn’t slow down, which in turn will improve your productivity. By the steps we went over above, you can do it yourself and enjoy a better computing experience.
Leave a Reply